Are you tired of spending too much money at coffee shops for your favorite frothy drinks? Look no further! In this article, we will show you the secret to making delicious and frothy drinks right at home using a Blender Bottle. With just a few simple steps, you can have your frothy drink fix anytime you want, all without breaking the bank. So grab your Blender Bottle and get ready to impress yourself and your friends with your barista-like skills. Let’s get blending!
Review contents
Choosing the Right Blender Bottle
Consider the Size and Material of the Bottle
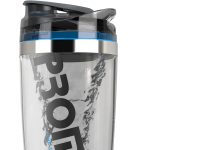
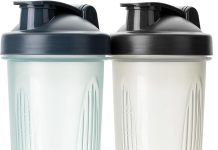
When choosing a blender bottle, it’s important to consider its size and the material it is made of. The size of the bottle will depend on your personal preference and the amount of drink you typically make. If you prefer larger servings, opt for a bottle with a larger capacity. On the other hand, if you prefer smaller portions or portability, a smaller bottle would be a better choice.
In terms of material, blender bottles are typically made of either plastic or glass. Plastic bottles are lightweight, durable, and often more affordable. They are also a great option for those who are always on the go. On the other hand, glass bottles are more aesthetically pleasing and offer a cleaner taste, especially if you are using ingredients that may react with plastic.
Check the Lid and Cap Design
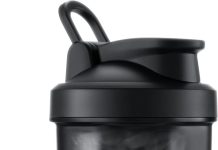
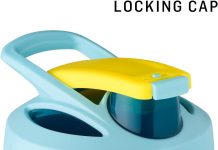
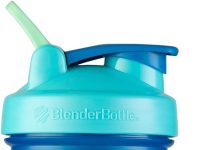
The lid and cap design of a blender bottle plays a crucial role in both the functionality and convenience of using the bottle. Look for a bottle that has a secure and leak-proof lid. This ensures that your ingredients won’t spill while you’re shaking the bottle vigorously. A flip-top cap is also a great feature to have, as it allows for easy pouring without having to remove the entire lid.
Some blender bottles come with additional features such as a carrying loop or a handle, which can make it easier to carry the bottle around or hang it from your bag. Additionally, a bottle with a wide mouth opening is ideal as it makes it easier to add and clean the ingredients.
Look for a Blender Ball
One of the most essential features to look for in a blender bottle is the presence of a blender ball. This small metal whisk-like ball helps in mixing and blending the ingredients effectively, ensuring a smooth and frothy texture. The blender ball acts as a mixing mechanism, breaking down lumps and clumps, resulting in a well-mixed and consistent drink.
When choosing a blender bottle, make sure it includes a blender ball and that the ball is made of high-quality stainless steel. This ensures its durability and longevity, even with repeated use. The shape of the blender ball can also vary, with some bottles featuring a spherical ball, while others have a spiral or wire ball design. Ultimately, it comes down to personal preference, as both types of balls work effectively in creating frothy drinks.
Preparing the Ingredients
Gather Your Preferred Drink Ingredients
Before you begin making your frothy drink in a blender bottle, gather all the ingredients you’ll need. This includes the base liquid, such as milk or water, as well as any powdered or solid ingredients, sweeteners, and flavorings you plan to use. This step is crucial to ensure that you have everything ready and easily accessible when it’s time to add them to the blender bottle.
Consider the type of frothy drink you want to make and choose ingredients accordingly. For example, if you’re making a protein shake, you’ll need protein powder, milk or water, and any additional flavorings or sweeteners you prefer. If you’re making a frothy coffee drink, gather coffee powder, milk or alternative milk, and any desired sweeteners or flavorings.
Measure the Ingredients Properly
When making frothy drinks, it’s important to measure the ingredients properly to ensure the right balance of flavors and consistency. Using measuring cups or a kitchen scale can help you accurately measure the necessary quantities.
For liquid ingredients, such as milk or water, use a measuring cup to ensure you add the correct amount. For powdered or solid ingredients, such as protein powder or coffee, use a kitchen scale or the provided scoop to measure the recommended serving size.
Measuring the ingredients properly not only ensures the desired taste but also helps you achieve the proper consistency and frothiness of the drink.
Adding the Ingredients to the Blender Bottle
Add Liquid Ingredients First
To achieve the best results when making frothy drinks in a blender bottle, start by adding the liquid ingredients first. Pour the desired amount of milk, water, or any other liquid base into the blender bottle. Adding the liquid first helps create a smoother blending experience, as the powdered or solid ingredients will have a surface to mix with.
Be mindful not to overfill the bottle, as leaving some space allows room for the blender ball and for the ingredients to move around and blend properly when shaking the bottle.
Add Powdered or Solid Ingredients Next
Once the liquid is in the blender bottle, it’s time to add the powdered or solid ingredients. This includes ingredients like protein powder, coffee, cocoa powder, or any other powdered or finely ground substances.
Measure the recommended amount of each ingredient and add them to the blender bottle on top of the liquid. This layering technique ensures that the powder is mixed evenly with the liquid when you start shaking the bottle.
Add Sweeteners or Flavorings
If you prefer your frothy drink to be sweet or have additional flavors, now is the time to add those ingredients. This can include honey, syrup, flavored extracts, or any other sweeteners or flavorings of your choice.
Remember to measure these ingredients as well to ensure you achieve the desired taste. Add them to the blender bottle on top of the other ingredients, and you’re now ready to start creating that frothy goodness!
Blending Techniques for Frothy Drinks
Use a Blender Ball for Effective Mixing
To achieve the perfect frothy consistency, the blender ball in your blender bottle is your best friend. Once all the ingredients are in the bottle, securely close the lid with the blender ball inside.
Shake the bottle vigorously, allowing the blender ball to move around and thoroughly mix the ingredients together. The blender ball breaks down any lumps or clumps, ensuring a smooth and well-blended drink with a delightful frothiness.
Include Ice Cubes for Chill and Thickness
If you prefer your frothy drinks to be chilled and thicker in consistency, consider adding some ice cubes to the blender bottle. The cold temperature of the ice cubes will help cool down the drink, making it refreshing and enjoyable.
Additionally, the ice cubes can add thickness to your drink, resulting in a richer and creamier texture. Simply add a few ice cubes to the blender bottle before shaking, and let the blender ball do its magic!
Blend in Intervals to Achieve Proper Consistency
For certain frothy drinks, especially those with multiple ingredients or those that require blending for a longer duration, it can be beneficial to blend in intervals. This technique allows the ingredients to mix thoroughly and creates a more consistent frothy texture.
To blend in intervals, shake the blender bottle vigorously for a few seconds, then pause and give it a quick swirl or shake between each interval. This helps prevent the ingredients from settling at the bottom and ensures that the frothiness is evenly distributed throughout the drink.
Shaking the Blender Bottle
Securely Close the Lid
Before you start shaking the blender bottle, make sure the lid is securely closed. Ensuring a tight seal on the lid prevents any potential leaks, ensuring that your hard work in creating a frothy drink doesn’t go to waste.
Take a moment to double-check that the lid is tightly closed, paying attention to any flip-top caps or additional closures the bottle may have. This step is essential to avoid any accidents or spills during the shaking process.
Hold the Bottle Properly
Properly holding the blender bottle while shaking is crucial for both your safety and the effectiveness of the blending process. Grip the bottle by placing one hand securely around the main body of the bottle, ensuring a firm hold.
Be cautious of the lid area, especially if it has a flip-top cap or an opening for pouring. While shaking vigorously, it’s important to keep a firm grip to avoid any accidental spills or injuries.
Shake Vigorously for Optimal Results
Once you have a secure hold on the blender bottle, it’s time to start shaking vigorously. The shaking motion helps the blender ball mix and blend the ingredients, creating that desirable frothy texture.
Shake the bottle up and down, side to side, and in circular motions, making sure the movement is vigorous and continuous. The more vigor you apply, the better the blending action, resulting in a frothy drink that’s both pleasing to the eye and delicious to taste.
Enhancing Frothiness
Choose the Right Type of Milk
The type of milk you use can significantly impact the frothiness of your drink. While regular dairy milk can produce a creamy froth, alternative milk options such as almond milk, oat milk, or soy milk can also create a pleasing frothy texture.
Experiment with different types of milk to find the one that produces the desired frothiness for your taste preferences. Keep in mind that the fat content in milk can also affect the frothiness, with higher-fat milk generally producing thicker and creamier froth.
Try Alternative Ingredients for Frothiness
In addition to milk, there are several alternative ingredients you can incorporate to enhance the frothiness of your drink. For example, adding a tablespoon of Greek yogurt or a small amount of coconut cream can provide a creamy and frothy texture.
You can also experiment with adding egg whites or aquafaba, which is the liquid from canned chickpeas. These ingredients create a frothy texture when whipped or shaken in the blender bottle.
Experiment with Different Ratios
The ratio of ingredients can also play a role in achieving the desired frothiness. Experiment with different ratios of liquid to powdered or solid ingredients to find the perfect balance for your taste.
For a frothier drink, you may want to increase the proportion of liquid ingredients, especially if you’re using a blender bottle with a smaller blender ball. Alternatively, reducing the amount of liquid and increasing the proportion of powdered ingredients can result in a thicker, more frothy consistency.
Don’t be afraid to experiment and adjust the ratios until you find the perfect combination for your frothy drink preferences.
Adding Toppings or Garnishes
Whipped Cream
To take your frothy drink to the next level, consider adding a dollop of whipped cream as a topping. Whipped cream not only adds visual appeal to your drink but also provides a creamy and indulgent texture.
Using a piping bag or a spoon, add a generous swirl of whipped cream on top of your frothy drink. You can also sprinkle some cocoa powder or cinnamon sugar on top for an extra touch of flavor and decoration.
Cocoa Powder or Cinnamon Sugar
For an extra burst of flavor, consider dusting your frothy drink with cocoa powder or cinnamon sugar. These toppings not only add depth to the taste but also enhance the overall presentation.
Using a fine-mesh sieve or a small shaker, lightly dust the top of your drink with cocoa powder or cinnamon sugar. This simple addition can transform an ordinary frothy drink into a delightful treat for both the eyes and taste buds.
Sliced Fruits or Mint Leaves
If you’re looking to add a fresh and vibrant touch to your frothy drink, consider garnishing it with sliced fruits or mint leaves. This not only adds a pop of color but also introduces a refreshing flavor element.
Choose fruits that pair well with the flavors of your drink. For example, if you’re making a frothy strawberry smoothie, add a few sliced strawberries on top. If you’re making a mint chocolate shake, garnish with a sprig of fresh mint leaves.
Not only does this add a beautiful aesthetic, but it also allows you to enjoy a little surprise texture and flavor as you sip your frothy creation.
Cleaning and Maintenance
Rinse Immediately After Use
To ensure the longevity and cleanliness of your blender bottle, it’s important to rinse it immediately after use. Rinse the bottle under warm water, ensuring that all the leftover ingredients and residue are thoroughly flushed out.
Rinsing immediately helps prevent any ingredients from drying and sticking to the bottle, making the cleaning process much easier. If you’re unable to clean it right away, at least rinse it and leave it soaking in warm, soapy water until you can thoroughly clean it.
Use Warm, Soapy Water for Cleaning
Regular cleaning is essential to maintain the hygiene of your blender bottle. After rinsing, wash the blender bottle with warm, soapy water. Use a mild dish soap and a soft sponge or bottle brush to clean both the interior and exterior of the bottle.
Pay attention to the blender ball, ensuring that it is thoroughly cleaned as well. Rinse the bottle and the blender ball with clean water to remove any soap residue.
Consider Using a Bottle Brush for Deep Cleaning
For a thorough and deep clean, consider using a bottle brush. A bottle brush is specially designed to reach all areas of the bottle, including the narrow neck and corners that are difficult to clean with a sponge.
Gently scrub the interior of the blender bottle using the bottle brush, paying attention to any hard-to-reach spots. Rinse the bottle and the brush thoroughly to ensure no cleaning agents are left behind.
Allow the blender bottle to air dry completely before reassembling and storing it. Regular cleaning and maintenance not only ensure the longevity of your blender bottle but also help maintain its performance in creating frothy drinks.
Safety Measures
Avoid Overfilling the Bottle
When using a blender bottle, it’s important to avoid overfilling it. Overfilling can lead to spills, especially when shaking the bottle vigorously to create frothy drinks. Leaving some space at the top of the bottle allows room for the ingredients to move and blend properly.
Always refer to the marked capacity measurements on the bottle to ensure you don’t exceed the recommended fill line. This helps prevent any accidents, such as leaks or the contents spilling out while shaking.
Check the Maximum Temperature Limit
Before adding hot liquids or blending hot ingredients, it’s crucial to check the maximum temperature limit of your blender bottle. Some bottles are designed specifically for cold or room temperature liquids and may not be suitable for hot beverages.
Exceeding the maximum temperature limit can damage the bottle or even cause burns if the lid isn’t properly secured. It’s always best to err on the side of caution and refer to the manufacturer’s instructions regarding temperature limitations.
Keep the Bottle Securely Closed
When shaking the blender bottle vigorously to create frothy drinks, it’s important to keep the bottle securely closed. Ensure that the lid is tightly secured and the flip-top cap or any additional closures are properly engaged.
Shaking the blender bottle with an insecurely closed lid can lead to spills and accidents. Take a moment to check that everything is tightly sealed before you start shaking.
Troubleshooting Tips
Ball Not Mixing Ingredients Properly
If you find that the blender ball is not mixing the ingredients properly or leaving behind lumps, there are a few possible solutions.
First, make sure that the ingredients are added in the correct order, starting with liquid ingredients first. This allows the blender ball to have proper contact with the ingredients and blend them evenly.
Second, check that the blender ball is clean and free of any residue that may be hindering its movement. If the ball is damaged or worn out, consider replacing it with a new one for optimal mixing performance.
Finally, if you’re still experiencing issues with the blender ball, try shaking the bottle with different movements or with varying levels of intensity. Experimentation can help you find the best shaking technique to ensure the blender ball effectively mixes the ingredients.
Drinks Not Getting Frothy Enough
If your drinks are not achieving the desired level of frothiness, there are a few factors to consider.
First, check the freshness and quality of your ingredients. Using fresh and high-quality ingredients, especially dairy milk, can greatly enhance the frothiness of your drink.
Next, ensure that you’re shaking the blender bottle with enough vigor and for an adequate amount of time. Frothiness is achieved through vigorous shaking, allowing the blender ball to effectively mix the ingredients. If you’re not shaking the bottle vigorously enough, consider increasing the intensity or duration.
Lastly, experiment with different ratios of ingredients to find the balance that produces the frothiness you desire. Adjusting the ratio of liquid to powdered or solid ingredients can create a thicker froth and result in a more satisfying drink.
Lid Leaking or Not Closing Properly
If you’re experiencing issues with the lid leaking or not closing properly, there are a few steps you can take to address the problem.
First, ensure that the lid and the bottle are clean and free from any residue. Any debris or residue on the sealing surfaces can prevent a tight seal and cause leaks. Thoroughly clean all parts of the lid, paying attention to the sealing ring or gasket.
Second, double-check that the lid is securely closed and the flip-top cap or any additional closures are properly engaged. Sometimes, a simple adjustment or tightening can resolve the issue.
If the problem persists, consider contacting the manufacturer for assistance. They may be able to provide guidance or offer a replacement lid if necessary.
By following these troubleshooting tips, you can address common issues and ensure that your blender bottle functions properly for creating frothy drinks.
In conclusion, making frothy drinks in a blender bottle requires careful consideration of the bottle itself, as well as the ingredients and techniques used. By choosing the right blender bottle, preparing the ingredients properly, and using effective blending and shaking techniques, you can create delicious and frothy drinks to enjoy at any time. Don’t be afraid to experiment with different ingredients, ratios, and garnishes to elevate your frothy drink creations. With a little practice and creativity, you’ll become a master of frothiness in no time!


