Here’s a handy guide on the proper way to clean a juicer that will have it sparkling in no time. With all the pulp and residue that can get stuck in the nooks and crannies, cleaning a juicer might seem like a daunting task. However, with a few simple steps and a little bit of effort, you can have your juicer looking and smelling fresh, ready for your next delicious concoction. So, let’s roll up our sleeves and get your juicer squeaky clean!
Review contents
Cleaning a Juicer Properly
Juicing has become an increasingly popular way to incorporate more fruits and vegetables into our diets. There’s nothing quite like starting the day with a glass of freshly squeezed juice, bursting with vitamins and nutrients. However, one aspect of juicing that often gets overlooked is the cleaning process. Cleaning your juicer properly is essential for maintaining its performance and ensuring that you’re consuming clean, healthy juice every time. In this comprehensive guide, we’ll walk you through the importance of cleaning, the tools and supplies you’ll need, and the step-by-step process of properly cleaning your juicer.
This image is property of blog.squaretrade.com.
Importance of Cleaning
Cleaning your juicer is not just about getting rid of the pulp and residue left behind after juicing; it’s also about maintaining the longevity and efficiency of your machine. When you juice fruits and vegetables, tiny particles get stuck in different parts of the juicer, including the blades, mesh filter, pulp container, and juice container. If these parts aren’t cleaned thoroughly, these particles can accumulate over time, leading to bacterial growth, mold, and even a decline in the juicer’s performance.
Additionally, improper cleaning can result in the lingering taste and smell of previously juiced produce in your next batch of juice. Nobody wants their apple juice to taste like celery! By cleaning your juicer properly, you ensure that each glass of juice is fresh, flavorful, and free from any lingering flavors of the past.
Cleaning Tools and Supplies
Before diving into the cleaning process, let’s gather all the tools and supplies you’ll need to clean your juicer efficiently:
- Soft-bristle brush: This will help you scrub away any stubborn residue stuck on the juicer’s components.
- Dish soap: Choose a gentle, non-toxic dish soap that won’t leave behind any harmful chemicals in your juicer.
- Microfiber cloth: This will come in handy for wiping down the juicer’s body and drying the components.
- Water: You’ll need ample water supply for rinsing off the soap and cleaning the various parts of the juicer.
With these basic tools and supplies, you’re ready to embark on the journey of cleaning your juicer properly.
This image is property of www.firstforwomen.com.
Cleaning Process
Now that we’ve understood the importance of cleaning and gathered the necessary tools, let’s delve into the step-by-step process of cleaning your juicer thoroughly.
Cleaning the Juicer Body
Start by unplugging the juicer from the power source and disassembling the juicing components. Using a damp microfiber cloth, wipe down the entire juicer body, including the exterior and any buttons or dials. This will remove any dirt or residue that may have accumulated during the juicing process.
Cleaning the Juicing Components
Next, focus on cleaning the main juicing components – the pulp container, juice container, mesh filter, and blades. Rinse these components with warm water to remove any large debris. Once rinsed, use the soft-bristle brush and a small amount of dish soap to scrub away any remaining residue or pulp. Be sure to pay extra attention to the mesh filter and blades, as these are the areas where most of the juicer’s particles tend to get trapped.
Cleaning the Pulp Container
The pulp container collects the fibrous pulp leftover from the juicing process. Empty the pulp container and rinse it thoroughly under running water. Use the soft-bristle brush to remove any pulp or residue stuck to the sides. Afterward, give it a final rinse to ensure it’s clean and free from any debris.
Cleaning the Juice Container
The juice container holds the freshly extracted juice. Empty any remaining juice into a glass and rinse the container with warm water immediately after use. This will prevent the juice from drying and making the cleaning process more difficult. If the container has a lid or spout, ensure these areas are cleaned thoroughly as well. Don’t forget to check for any hidden spots where juice may have splattered.
Cleaning the Mesh Filter
The mesh filter is one of the most crucial components of a juicer, responsible for extracting the juice while keeping the pulp out. Remove the mesh filter from the juicer and rinse it under warm water to remove any large particles. To clean more thoroughly, soak the filter in warm soapy water for a few minutes. Then, using the soft-bristle brush, gently scrub away any remaining residue. Rinse the filter again to ensure it’s entirely clean before reassembling the juicer.
Cleaning the Blades
The blades, also known as cutting discs, play a vital role in the juicing process. To clean them, carefully remove the blades from the juicer and rinse them under warm water. Pay close attention to any nooks and crannies where pulp or juice might have gotten trapped. If necessary, use the soft-bristle brush to remove any stubborn residue. Once they’re thoroughly cleaned, dry the blades carefully to prevent any water spots or corrosion.
Drying and Storing the Juicer
Once you’ve cleaned and rinsed all the juicer components, it’s important to let them air dry to avoid any potential mold growth. Place the parts on a clean dishcloth or drying rack and allow them to air dry completely. Once dry, reassemble the juicer, ensuring all parts are properly aligned and securely attached.
To maintain the longevity of your juicer, it’s essential to store it properly. Find a clean and dry place in your kitchen where the juicer can be stored safely. If possible, keep the juicer disassembled when not in use to prevent any moisture build-up. This will also make the cleaning process easier and more efficient the next time you use your juicer.
Cleaning your juicer properly is a practice that should be followed religiously to ensure the health and hygiene of your juicing experience. By dedicating a few extra minutes to cleaning your juicer, you not only maintain its performance but also ensure that every glass of juice you enjoy is as fresh as the first. Cheers to a clean and healthy juicing journey!
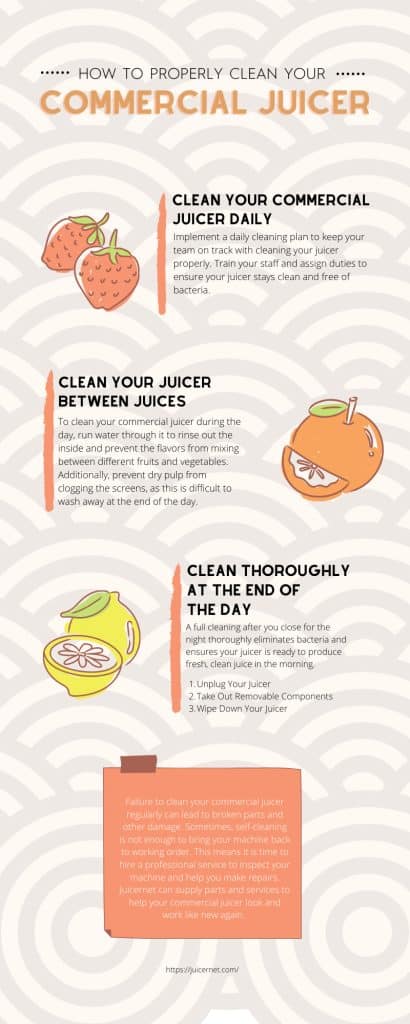
This image is property of juicernet.com.


